The Facts About Gas Installation Uncovered
Table of ContentsThe Best Guide To Gas InstallationGas Installation Fundamentals ExplainedA Biased View of Gas InstallationThe 15-Second Trick For Gas Installation
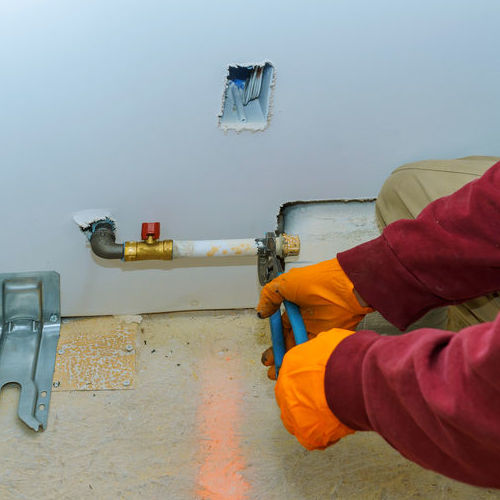
The installer of the old gas cooktop had run into the very same trouble. Look below: a gas regulatory authority, currently transformed to LP gas as well as of the identical component number as our brand-new gas regulatory authority was currently mounted and also connected atop the structure wall surface in a particular niche where it just fit.
Not shown was one more gas shut-off shutoff mounted lower on the inside of the foundation wall, however as this shutoff is unattainable thanks to the built-in oven, it's the exterior shut-off that is really used in this cooktop installation. At above ideal we are preparing the pipeline nipple area on the brand-new gas cooktop to receive the flare adapter that will permit link of the versatile gas connector tubing.
At above left you can see the new flare adapter being screwed onto the cooktop's gas inlet nipple. In this particular installation the flexible gas adapter will certainly be transmitted from the gas regulator to this flare adapter. In other installments the regulatory authority might be attached to the gas inlet nipple and the adaptable gas port directed in between the regulator's inlet end as well as the inbound gas piping.
The smart Trick of Gas Installation That Nobody is Discussing
Tighten this fitting taking care not to over-tighten and also twist elements up inside the cooktop itself. At above ideal you can see that during link of the adaptable gas tubing to the flare adapter functioning area obtains a bit tight. That's due to the fact that we did not wish to have to completely eliminate and later on re-install the built-in gas oven listed below the cooktop.
A scratch on the flare installation's mating face can result in a hard-to-find gas leakage. Examine for gas leaks after that turn gas supply back off (so if you damage something throughout the remainder of installment you may live to tell regarding it) At listed below left you can see useful source the basic gas leak test used by a lot of gas device installers: a spray soap solution.
Be certain to check every gas link for bubbles - those mean there is a gas leak to be fixed. At above right you can see the spray solution around the flare link and in shadow, the threaded connection of the flare adapter to the gas inlet nipple. These connections and also all of the gas piping links should be checked for leakages.
You might use a combustible gas detector to check for gas leaks likewise, yet if that tool find a leak you might still have to go back this approach to separate it.
The 45-Second Trick For Gas Installation
The factor we make this examination now prior to final protecting of the cooktop in location is that if we find we need to alter or deal with something currently is a less complicated time than after the cooktop is ultimately secured. If you have trouble with uneven fire or igniter clicking check initially for heater caps that are not appropriately seated.
If the gas fire is unequal or color dramatically off the air change at the burner controls might be wrong or even worse, you did not install the appropriate gas orifice or spud.
For this cooktop Bosch likewise provides screws and clamps that are used to safeguard the cooktop to the countertop from below, though suitable them in position can be tough when room is very limited by a built-in oven below the cooktop. Unlike the maker's referrals as well as because we were precision-fitting the cooktop to simply barely cover a too-large intermediary (in the front to rear measurement) made by the kitchen counter installer years earlier, we added a small grain of clear silicone sealer around the side of the cooktop where it fulfills the counter top surface area.
In our picture over the board and cardboard shim at the rear of the cooktop are holding it precisely straightened in place to ensure that our last actions at protecting the cooktop will not have actually to be done over once again. Obviously this board and shim are eliminated before the cook top is to be utilized. see post gas installation.
Get This Report on Gas Installation
In the setup directions you'll see the cutout dimensions. I do not such as the sides of the cooktop underside to really speak to anything combustible such as wood home cupboard facing or mounting, even when the supplier says zero clearance is OK; I such as 1/4" However don't make the intermediary opening also big.

Likewise consider distance from the front as well as back of the counter when locating the opening as you have to remove the inside surface area of the base cabinet front facing at the front of the cutout, and also behind the intermediary opening you do not intend to be closer to the wall surface than needed - gas installation.
Jim The pipe diameter you need relies on the distance you have to run the line along with the flow rate or input BTUH of the home appliance. A common OK or NOT alright simply would not make feeling. Take an appearance in the IO manual for your stove top: typically they'll provide pipeline sizes and ranges.